
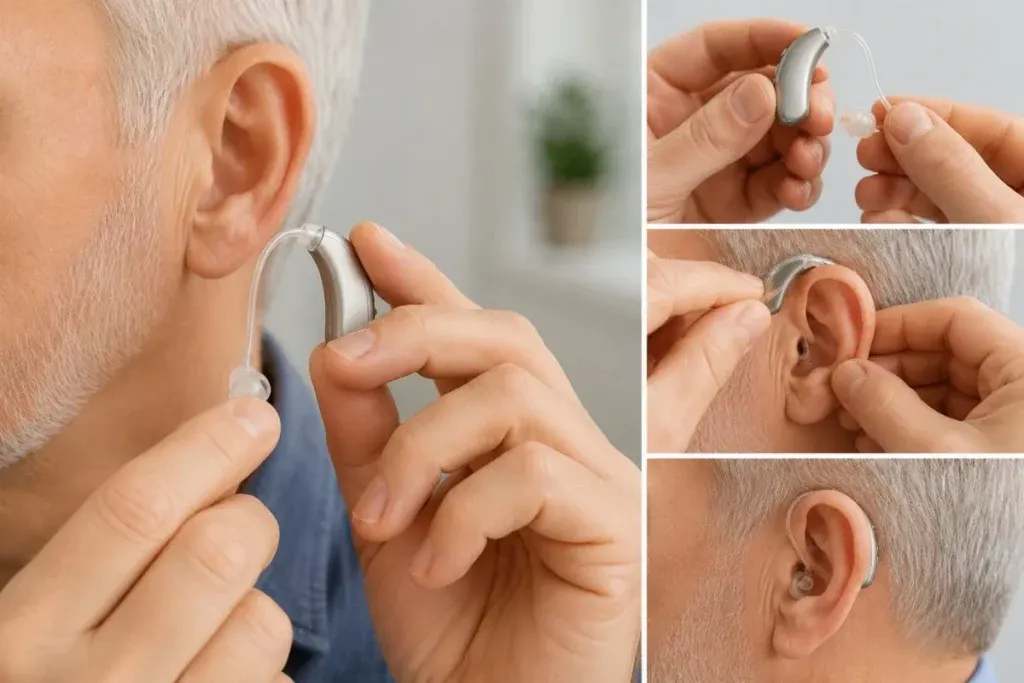
Adjusting to life with a new hearing aid is a major step toward reclaiming your daily confidence and staying connected to the people you love. However, if you are handling hearing aids for the first time, figuring out how to insert them can feel a little intimidating or clumsy.
To put in hearing aids correctly, first identify the right and left devices, then gently place the hearing aid into your ear according to its design. Behind-the-ear models sit behind the ear with a dome inside the ear canal, while in-the-ear models fit directly into the ear. A proper fit improves comfort, sound quality, and device performance.
With a little practice and the right technique, it quickly becomes part of your daily routine. This guide explains how to put in different types of hearing aids, common mistakes to avoid, and simple tips for a comfortable fit.
When you position your hearing aid perfectly within your ear, you secure several critical benefits:
When a hearing instrument is positioned perfectly against your unique ear anatomy, you shouldn’t have to guess. Your device is likely seated exactly where it needs to be if it ticks the following boxes:
Tip: If the hearing aid feels loose, causes discomfort, or whistles continuously, remove it gently and try inserting it again.
Before touching your ears, place your device on a clean, flat surface.
Hold the device by the main body. Ensure the speaker tip or custom ear mold faces directly toward your ear opening rather than pointing up or down.
Because different hearing instruments feature entirely distinct form factors, your physical insertion technique will depend on the specific style of your device.
If your model features a thin plastic tail (retention lock), tuck this strand along the bottom curve of your ear bowl. It acts as an internal spring to keep the dome from shifting out during the day.
Once seated, the device should feel snug but not painful. Open and close your mouth to ensure the movement doesn’t dislodge it. If you hear a continuous squealing noise, the device is not pushed deep enough to form a proper seal.
If you are facing physical resistance when inserting your devices, the root cause typically falls into one of three categories:
Hearing Aid Type | Best Suited For | Insertion Profile | Primary Handling Challenge |
Receiver-in-Canal (RIC) | Mild to Severe Hearing Loss | Two parts: Body behind the ear, small speaker inside the canal. | Managing the thin wire without bending it. |
Traditional Behind-the-Ear (BTE) | Severe to Profound Hearing Loss | The body behind the ear is connected to a custom-molded plastic piece. | Aligning the custom mold perfectly with the outer ear folds. |
In-the-Ear (ITE) | Moderate to Severe Hearing Loss | Single custom shell filling the entire outer ear bowl. | Orient the device right-side up before pushing it in. |
Completely-in-Canal (CIC) | Mild to Moderate Hearing Loss | Deep placement inside the ear path; virtually invisible. | Pinching the tiny removal string to pull it out. |
A few fundamental maintenance items can significantly reduce daily frustration:
While patience and daily repetition build confidence, certain issues require expert help. If you encounter persistent pain, notice fluid, or struggle to get a clear sound even after following these steps, a professional should inspect your ear.
Note: If it has been over a year since your initial evaluation, scheduling a routine hearing test in Delhi can also help determine if your hearing profile has changed, which often affects how a device feels and sounds.
Learning how to put in hearing aids correctly becomes easier with practice. By identifying the correct device, using the proper insertion technique, and ensuring a comfortable fit, you can improve sound quality, reduce feedback, and enjoy a more comfortable listening experience throughout the day.
If your hearing aid feels uncomfortable, slips out frequently, causes soreness, or does not provide clear sound, do not ignore the issue. A professional hearing assessment and fitting adjustment can help ensure your device is positioned correctly and performing at its best.
With the right fit and regular care, hearing aids can help you stay connected, communicate more confidently, and get the most from your hearing technology every day.
Still finding it a bit clumsy to put in your devices or dealing with that annoying whistling sound? Connect with Hearing Hope to get expert fitting support or find a user-friendly device that perfectly matches your lifestyle and budget.

The editorial team at Hearing Hope intends to share expert-certified information on hearing loss, hearing tests, and hearing care solutions. We aim to ease your journey and provide you with reliable information and aid.
Get In Touch
Yes. Most hearing aid users are encouraged to wear their devices throughout the day, removing them only while sleeping, showering, or swimming. Consistent use helps the brain adapt to amplified sounds more effectively.
Incorrect insertion can cause discomfort, poor sound quality, whistling feedback, and difficulty hearing conversations clearly. Repositioning the device properly usually resolves these issues.
If your hearing aid causes pain, pressure, irritation, or discomfort, then it might have been inserted too deep in your ear. A properly fitted hearing aid should feel secure and comfortable without causing soreness.
A hearing aid may fall out because of incorrect insertion, an improper dome size, earwax buildup, or changes in ear shape. An audiologist can adjust the fit to improve comfort and stability.
Yes. Excess earwax can prevent proper insertion, reduce sound quality, block microphones or receivers, and cause hearing aids to feel loose. Regular ear and device cleaning can help maintain performance.
Most people become completely comfortable inserting their hearing aids within a few days to a few weeks. In the beginning, it is entirely normal for the process to take a few minutes or feel a bit clunky as your fingers adjust to the small device.
To speed up this learning curve, try practicing while sitting at a table with a mirror in front of you; this gives you a clear visual guide and ensures that if a device slips, it lands safely on a soft surface. With daily practice, muscle memory takes over, and the insertion process will quickly become a seamless, five-second part of your morning routine.
Hearing aids should feel snug and secure, but they should never feel tight, painful, or uncomfortable. A proper fit ensures the device stays anchored when you chew, talk, or shake your head without creating intense pressure inside your canal.
If you experience persistent pressure, physical soreness, or skin irritation after wearing them for a few hours, it usually means the device is not sitting at the correct angle, or the dome size needs to be adjusted.
No, the correct insertion method depends entirely on your specific device style (BTE, RIC, or ITE). However, all models follow the same universal preparation steps:
Mild awareness is normal during the first week. However, persistent soreness or sharp pain indicates an incorrect insertion depth or a poor device fit. Consult your audiologist to check for friction spots.
If the whistling stops once your hand is away from your ear, no action is needed. Whistling during insertion is a temporary sound reaction caused by your hand reflecting sound into the microphone. However, if your device continues to whistle or feed back throughout the day, it may mean your physical fit has shifted, or your hearing loss has progressed. Scheduling a comprehensive hearing test in Delhi will help your audiologist re-evaluate your ears and adjust the acoustic seal of your devices to eliminate the feedback.